How to Install the No Dig Empire Fence
- Annie Madren Young
- Oct 1, 2019
- 3 min read
With fall right around the corner, now is the time to spruce up your yard with an easy to install No Dig Empire Fence.

Nothing says fall like oyster roasts, fire put hangouts and fall leaves--which is why now is the perfect time to get your backyard in shape and looking good for the season. We installed this super light weight, fencing that requires no digging called the Empire Fence. It comes in three sizes total: the Empire, Grand Empire and Grand Empire XL fence and can be found at Lowes.
All you need for installation is:
Sledge hammer
Rubber mallet
Screw driver
Step 1: Layout Fencing on the Ground for Framework
The first step is laying out the fencing so you have an idea of where the panels will go and to make sure you have enough. The nice thing about No Dig fencing is you don't have to have string to measure where your posts will go--you can eyeball it along the way and adjust if needed.
Step 2: Unscrew screws and install bottom spike
The posts come packaged with the post, bottom spike and screw all together. You need to unscrew the bottom spike and gently hammer it into the ground with your sledgehammer or rubber mallet. It is easiest to start at a corner or an end point so you don't run out of space or have an uneven area if you start in the middle.
We found that a sledgehammer was way easier to use than a rubber mallet--but you may be stronger than us--ha! You can also soften the ground by watering it if you soil is very dry and tough.
Step 3: Insert Fence Pole Through Panel and Into Spike
Once you have your first corner or end spike installed, take your panel and hold it up, along with your post, and slide the post through the eyelets on the right side of the panel, connect the panel and teh post together. Don't drive your posts all the way into the ground yet until you're done in case you do need to adjust. The post should slip through the eyelets easily and go into the opening at the top of the spike in the ground.
Step 4: Eyeball Where Next Spike should go through Panel Eyelet
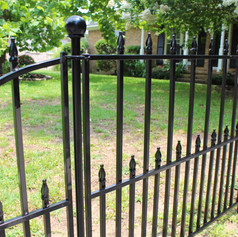
Now that your panel is connected on the right side, you can see on the left side, where your next spike should go by inserted the spike or a pencil through the eyelet of the panel on the left and marking the spot. Then install your next spiked post into the spot and slip the post through the panels to hold teh panel in place. You can easily adjust the spikes as needed. If you're installed on an incline, it might make it a little tricker but should still work fine. You can see in the picturee that ours is on an incline so the posts don't match up perfectly but it still looks nice.
Step 6: Repeat steps 2-5
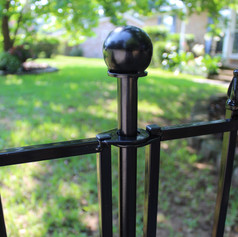
Next is to just repeat steps 2-4 all the way down until your fencing is complete. Then go back and hammer in the tops of the posts so you can get the post deeper into the ground and make the fence more stable. You want to be careful not to dent the top of the rounded posts in the process.


EPTU Machine ETPU Moulding…
EPTU Machine ETPU Moulding…
EPTU Machine ETPU Moulding…
EPTU Machine ETPU Moulding…
EPTU Machine ETPU Moulding…
EPS Machine EPS Block…
EPS Machine EPS Block…
EPS Machine EPS Block…
AEON MINING AEON MINING
AEON MINING AEON MINING
KSD Miner KSD Miner
KSD Miner KSD Miner
BCH Miner BCH Miner
BCH Miner BCH Miner